How to make 5 foods you thought you had to buy
By Saima Sidik
Homemade tomato sauce simmering on the stove puts me at peace with the world; it’s something about satisfying my need to eat with my own hands. Cooking from scratch is environmentally rewarding too. Whole foods often take less energy to transport than those that are processed, and if you make your food, you can choose where each ingredient comes from and try to buy those that are local and sustainably produced.
In this article, I present instructions for making or growing five familiar foods that people often buy: tortillas, tomato sauce, yogurt, lettuce and sprouts. My hope is that this information will empower readers to take a more active role in the production and preparation of their own food, partially because I believe that it can reduce the environmental impact of our eating habits, and partially because making my own food makes me very happy, and I’d like to share the skill with others.
Yogurt
Yogurt is made when specific bacteria are turned loose on milk and allowed to thicken it. All you need to do is introduce that bacteria under the right conditions. The following recipe is roughly based on Crystal Miller’s recipe from www.allfreecrafts.com.
1.) Heat two litres of whole milk to 180 degrees Fahrenheit (about 82 degrees Celsius). This will kill off all extraneous bacteria that are in the milk. As soon as the milk reaches 180 degrees, take it off the stove.
2.) Lower the temperature of the milk to 100 degrees Fahrenheit (about 37 degrees Celsius) and add half a cup of yogurt that’s already been made. The pre-made yogurt contains the bacteria that will thicken the milk. It’s important to use yogurt that’s as fresh as possible, so buy it on the day that you plan to make your yogurt. Alternatively, some health food stores sell a powder containing the right kind of bacteria, and you can substitute this for yogurt.
3.) Leave the milk/yogurt mixture at 90 to 110 degrees Fahrenheit for eight to twelve hours, or until it has thickened enough for your taste. I’ve found that a good way to maintain this temperature is by putting the yogurt in glass jars and leaving them in a sink full of hot water covered by a cutting board to hold the heat in.
4.) Run the yogurt through a blender to eliminate any chunks.
5.) Add your favorite flavourings. I suggest maple syrup and berries, but apples, honey, granola and jam also work well.
If your yogurt refuses to thicken, which has sometimes happened to me, there are several things that may have gone wrong. Your starter yogurt may be too old, or its bacteria may have been killed somehow, or your milk may have antibiotics in it. Experiment with different brands of milk and yogurt.
Roll a small handful of dough into a plate-sized circle that’s one to three millimetres thick.
Tortillas
This flat bread is useful for wraps, burritos, enchiladas and dipping in curry, and is a reliable way of stretching a meal. Here is a recipe for six tortillas:
1.) Heat 1½ cups of water until it’s as hot as you can stand to touch. Add one teaspoon of salt.
2.) Add all-purpose wheat flour (approximately 1â…“ to 1½ cups) to the water until you have thick, non-sticky dough. Knead the dough for five minutes.
3.) Grease the dough by kneading in a teaspoon of vegetable oil.
4.) Roll a small handful of dough into a plate-sized circle that’s one to three millimeters thick.
5.) Put the tortilla in a medium hot frying pan. Don’t add any oil yet.
6.) When the tortilla has started to become firm and turn white, pull up one corner and put a little oil under it. Spin the tortilla in a circle in the pan to evenly distribute the oil.
7.) Continue to cook, flipping as necessary, until the tortilla has begun to brown on both sides.
Tomato sauce
This recipe makes the whole house smell good. Any kind of tomato will work, but you can experiment to see which variety you prefer.
1.) Dice two or three large tomatoes and blend them.
2.) Mix the blended tomatoes with:
2 tablespoons of olive oil
1 crushed clove of garlic
½ tablespoon chopped fresh basil
1 tablespoon freshly chopped parsley
½ teaspoon dried oregano
2 bay leaves
â…› teaspoon citric acid powder
(Citric acid powder can be found in the vitamin sections of many health food stores.)
3.) Let the mixture boil briefly, then turn the heat down and let it simmer for half an hour.
4.) Add salt and pepper to taste. If the sauce is too acidic for you, add a little bit of baking soda to neutralize the acid. I recommend adding only a teaspoon of baking soda at a time.
Lettuce
If you have a small family and don’t eat salads for every meal, part of a head of lettuce will inevitably go bad before you finish it. Why not grow your own instead? This allows you to pick only a few leaves at a time, and also gives you an excuse to get outside!
Lettuce comes in many varieties, most of which can tolerate (and often prefer) cool temperatures. You can plant lettuce as soon as the threat of frost has passed and replant throughout the summer. If possible, give the plants shade for a few hours during hot days so as not to overwhelm them with heat. Instead of waiting for the whole head to mature, take what you want when you want it and continue to replenish the stock by occasionally replanting. Most lettuce plants are small, so you don’t need a yard to grow it. A pot on the deck or a window box will do the trick.
Sprouts only take a few days to mature, and they can be grown inside in water.
Sprouts
When the weather gets cold, I find it convenient to substitute sprouts for lettuce. These wee greens only take a few days to mature, and they can be grown inside in water. You can find mixes of sprouting seeds at many hardware stores. (I get mine at Canadian Tire.) These mixes often include plants such as broccoli, clover and alfalfa. The package of seeds that you find will probably have exact instructions on how to grow your sprouts, but it will be something like this:
1.) Put two tablespoons of seeds into a mason jar and cover them with water. Put cheese cloth over the top of the Mason jar and use a rubber band to hold it in place. Let the seeds soak for four hours.
2.) Let the water drain from the Mason jar, through the cheese cloth, by leaving the jar upside down or propped on an angle in the sink.
3.) Rinse the seeds twice a day, morning and evening, until they have germinated and turned into delicious-looking salad and sandwich fixings (about four days).
Bon appétit!
How to can tomatoes
By Julia Ewaschuk
Eat locally, goes the mantra. Judging from the growing number and popularity of farmers’ markets across the country, Canadians are getting this message, loud and clear. But how do you follow a 100-mile diet when the surrounding terrain is trapped under a sheet of ice for much of the year? Unless your idea of delicious mid-winter fare consists of frozen dirt cakes with snow icing, the answer to the conundrum of eating locally year-round in Canada can be found in, of all places, our grandparents’ kitchens.
My grandmother’s bustling and steamy basement canning kitchen, for instance, produced enough jarred fruits and vegetables to last through the winter. Whenever nature’s abundance mandated, our family would form an assembly line, blanching, peeling, packing and processing tomatoes, peaches, pears, or whatever happened to be in season on our weekend visit. I’ve finally realized the food preserving skills I had learned in my childhood are part of the solution to the ecological extravagance of February’s far-flung South African pears and Chilean apples.
It’s easier and more satisfying than you’d think to fill a shelf with beautiful, home-canned, local produce. At its simplest, canning requires nothing more than a big (20-30 litre) pot, canning jars and lids, and an hour or two of food preserving time. Fancier equipment like canning tongs, jar holders, canning funnels and bubble-freeing devices, are handy, but not essential.
The general principle is simple: get the food sealed tightly into the jar, with no microbes present. Sufficiently acidic foods can be preserved just by heating them to a specific temperature, for a specific length of time, thereby killing the moulds, bacteria and yeasts that might spoil the food and render it unsafe to eat. The only microbe that isn’t destroyed by heat alone is Clostridium botulinum, a dangerous type of bacteria whose heat-resistant spores require an acidic environment, in addition to heat, to be destroyed. Some foods are naturally acidic enough (anything less than pH 4.6); everything else requires either the addition of acid or the higher heat reached through the pressure canning method (not discussed here).
Many resource books and websites are available to guide you through the intricacies of various food preserving methods, and should be consulted to ensure safe canning. But to get you started, here are the details of preparing canned tomatoes, something you probably use quite a lot during the winter, when store-bought tomatoes are not only imported from remote lands, but also pallid and tasteless.
1.) Find delicious, ripe, local tomatoes at the farmers’ market or pick-your-own farm, or better yet, grow your own. You can preserve as few or as many as you’d like. It takes about seven large tomatoes to fill a one-quart jar.
2.) Place as many clean jars as you need upside-down on a clean towel-lined baking sheet. Bake at 200ºF for 15 minutes.
3.) Fill four pots two-thirds full of water to boil: your canning pot, a large pot for blanching tomatoes, a medium pot with water (or tomato juice) for filling airspaces, and a small pot for lids (boil the lids for ten minutes to sterilize them, then set to simmer until required).
4.) Cut the stem and white core out of each tomato.
5.) Blanch the tomatoes by dipping them in the large pot of boiling water for 30 seconds then plunge them into a sink full of cold water. Peels should slip off easily. Cut tomatoes in quarters.
6.) Important: Add two tablespoons of lemon juice to each quart jar; fill with tomatoes to within one centimetre of the rim. The acid from the lemons ensures a low enough pH to kill bacterial spores.
7.) Fill airspaces with boiling water or tomato juice to within 0.5 cm of the rim.
8.) Free any trapped bubbles with the handle of a wooden spoon or chopstick.
9.) Wipe the top of each jar carefully with clean, damp cloth to ensure a good seal. Place sterilized lid on top and screw on a ring, just finger-tight. Do not over-tighten.
10.) Place jars in the canning pot and boil for 40 minutes, keeping water 2.5 cm above the top of the jars.
11.) Cool overnight, ensure each lid is sealed.
12.) Open in February, and enjoy some mid-winter`s local eating!
Consult www.foodsafety.psu.edu/canningguide.html for more information.
How to live without a fridge
By Andrea Peloso
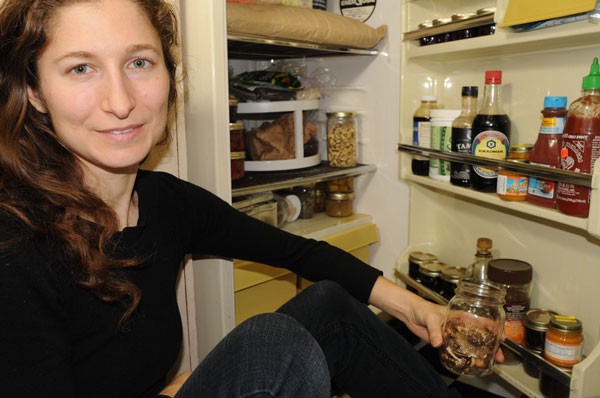
I first lived without a fridge as a student in Paris. Because of the abundance of local markets and bakeries, I hardly even noticed its absence. Years later, back in Canada and feeling that life had become too complicated, I thought unplugging my fridge might be a simple way out. Running such a huge machine, larger than a coffin, just for myself and my two-fist-sized stomach suddenly seemed more bizarre than convenient. I have now been living without a fridge for close to two years.
If you want to live without a fridge, all you have to do is unplug. Your fridge can be immediately converted into a storage unit right where it is. The lower portion can create space for your cupboard by holding canned and dried food, herbs, teas and spices. The upper portion makes a practical cupboard or can be filled with snow or ice and used as a cooler. (Unless you are using your fridge as a cooler, always keep it open a crack to prevent smells from forming.) With the hum of the fridge’s motor finally still, you will be amazed at the peace and quiet you bring to your home.
Most foods can last for a considerable time without a fridge. Cups of herbs or greens in water are a cheerful but constant reminder of the passage of time. Root vegetables, onions, peppers, and zucchini stay true. Eggs last for weeks. Somehow I had equated the existence of my fridge with the natural life of my food, but really, the fridge is a steroid – it can keep food fresh for a very long time, but why not just eat the food in a somewhat shorter time? I’m vegetarian, but dairy and meat are both to be treated with care. Use milk and meat the day you buy it and try to keep it cool. Cheese and dairy lasts overnight in a ziplock bag in cool water. In winter, these will be fine either in your garage or mud room, or in coolers that you fill with snow.
One of the biggest drawbacks of not having a fridge can by summed up by my friend Albert’s question: “But what about ice cream?” (Albert, an ecologist, had decided to accompany me on this journey in his own way.) Indeed, what about ice cream or a cold beer? Albert’s solution was to use his non-heated mud room in winter and a very small fridge for the summer. This can also be a great option – either reducing the size of your fridge, or choosing to unplug during certain seasons.
The summer months can be a sweet time to go fridge-free. Local produce is so fresh and plentiful that it will last longer than food shipped from abroad. Eating locally in the age of peak oil is best for farmer, earth, and consumer alike. To keep a year-round supply of local produce, fresh berries, corn and small cucumbers can all be canned for a great winter of local food with no freezing needed.
Of course, in the winter, you can keep anything cool for as long as you want due to our abundant resource of cold air, snow, and ice. Wool blankets can also be used as a cooler. I stored some ginger carrot soup for three days indoors by putting a small pot into a larger soup pot filled with fresh snow and protecting it with a wool blanket. Using ingenuity rather than energy adds a kind of adventure to everyday life that we seldom get to experience anymore. And it gives a more realistic picture of nature – a picture of abundant yet finite and delicate gifts, rather than an infinite source of power for all of our desires.
In the past, leftovers were like guests that had worn out their welcome. Post-fridge, I simply took fresh leftovers to share with my neighbor Bradley and I became a guest myself. I liked sharing new food discoveries, such as organic local apples I brought. Bradley realized that organic apples tasted better than what he normally bought. When I had a bad cold, Bradley heard me coughing through the walls, called and offered to buy some oranges for me. In a compartmentalized condo setting, we forged a true bond.
In giving up my fridge, I have gained a greater sense of connection to the ingenuity of my ancestors. I have a peaceful-sounding home, a new friend next door, a low electricity bill – and a deeper sense of harmony with the changing seasons.

_780_520_90_s_c1.jpg)